Table of Contents
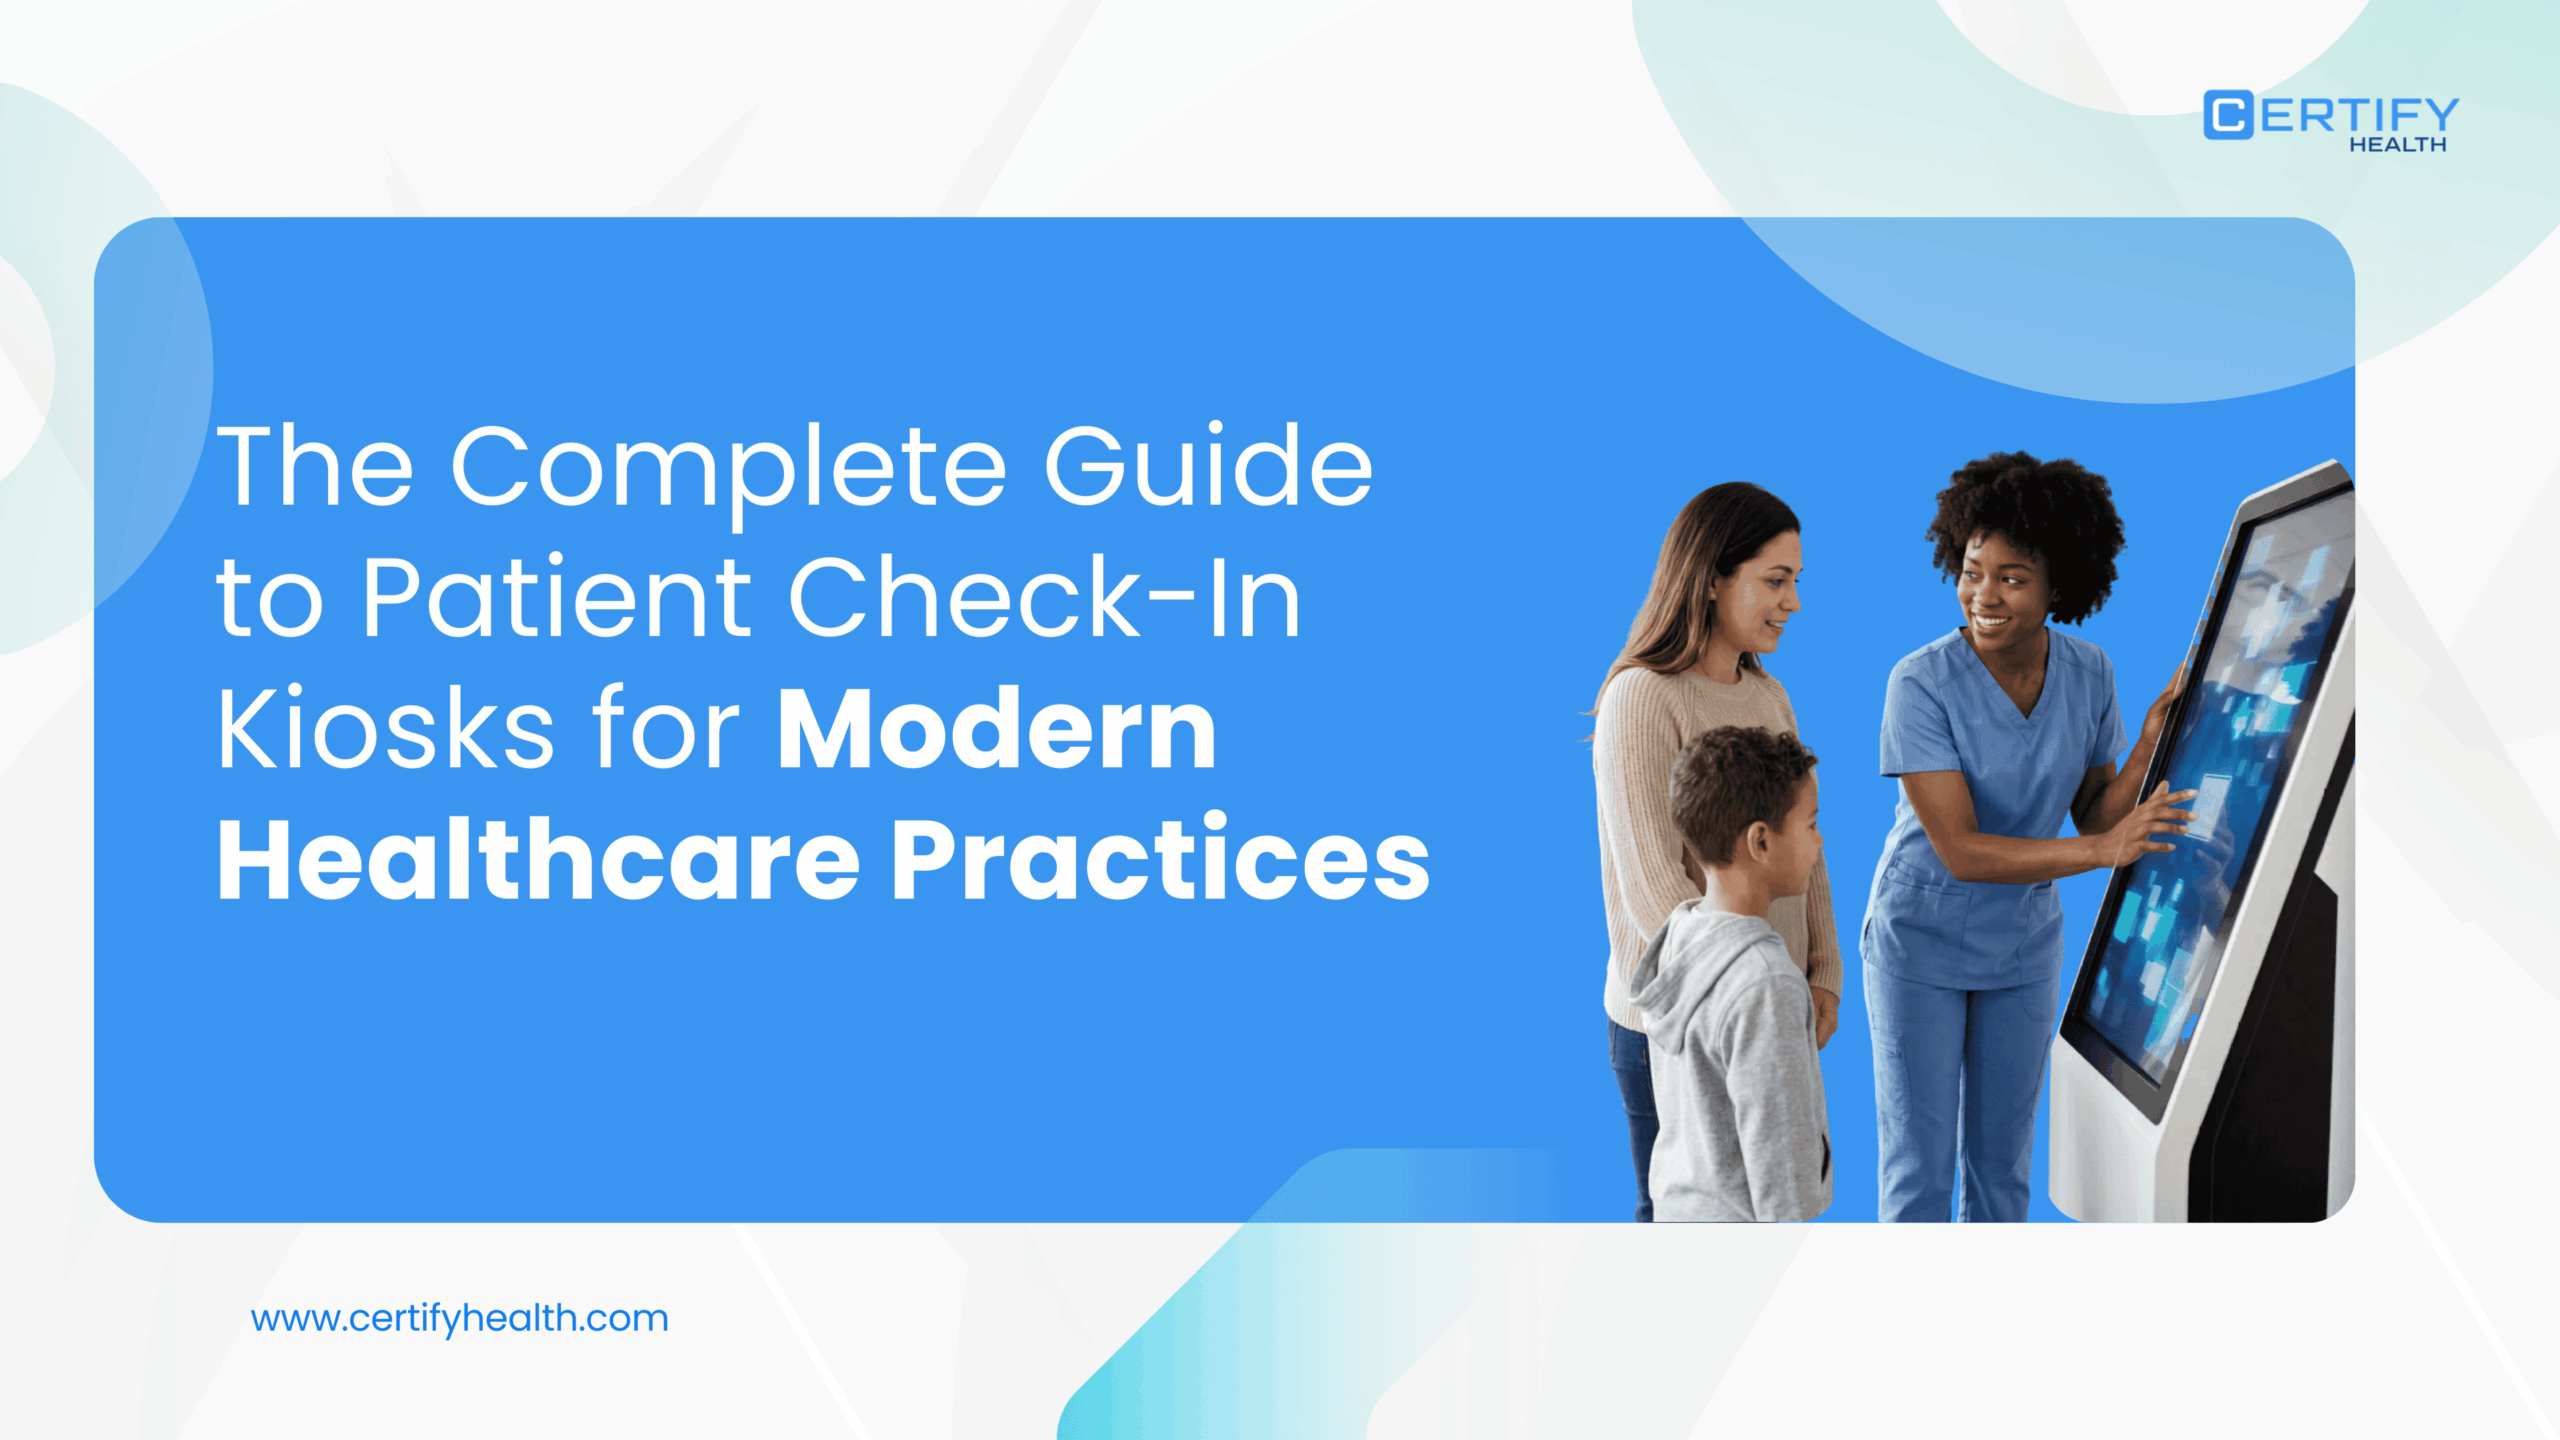
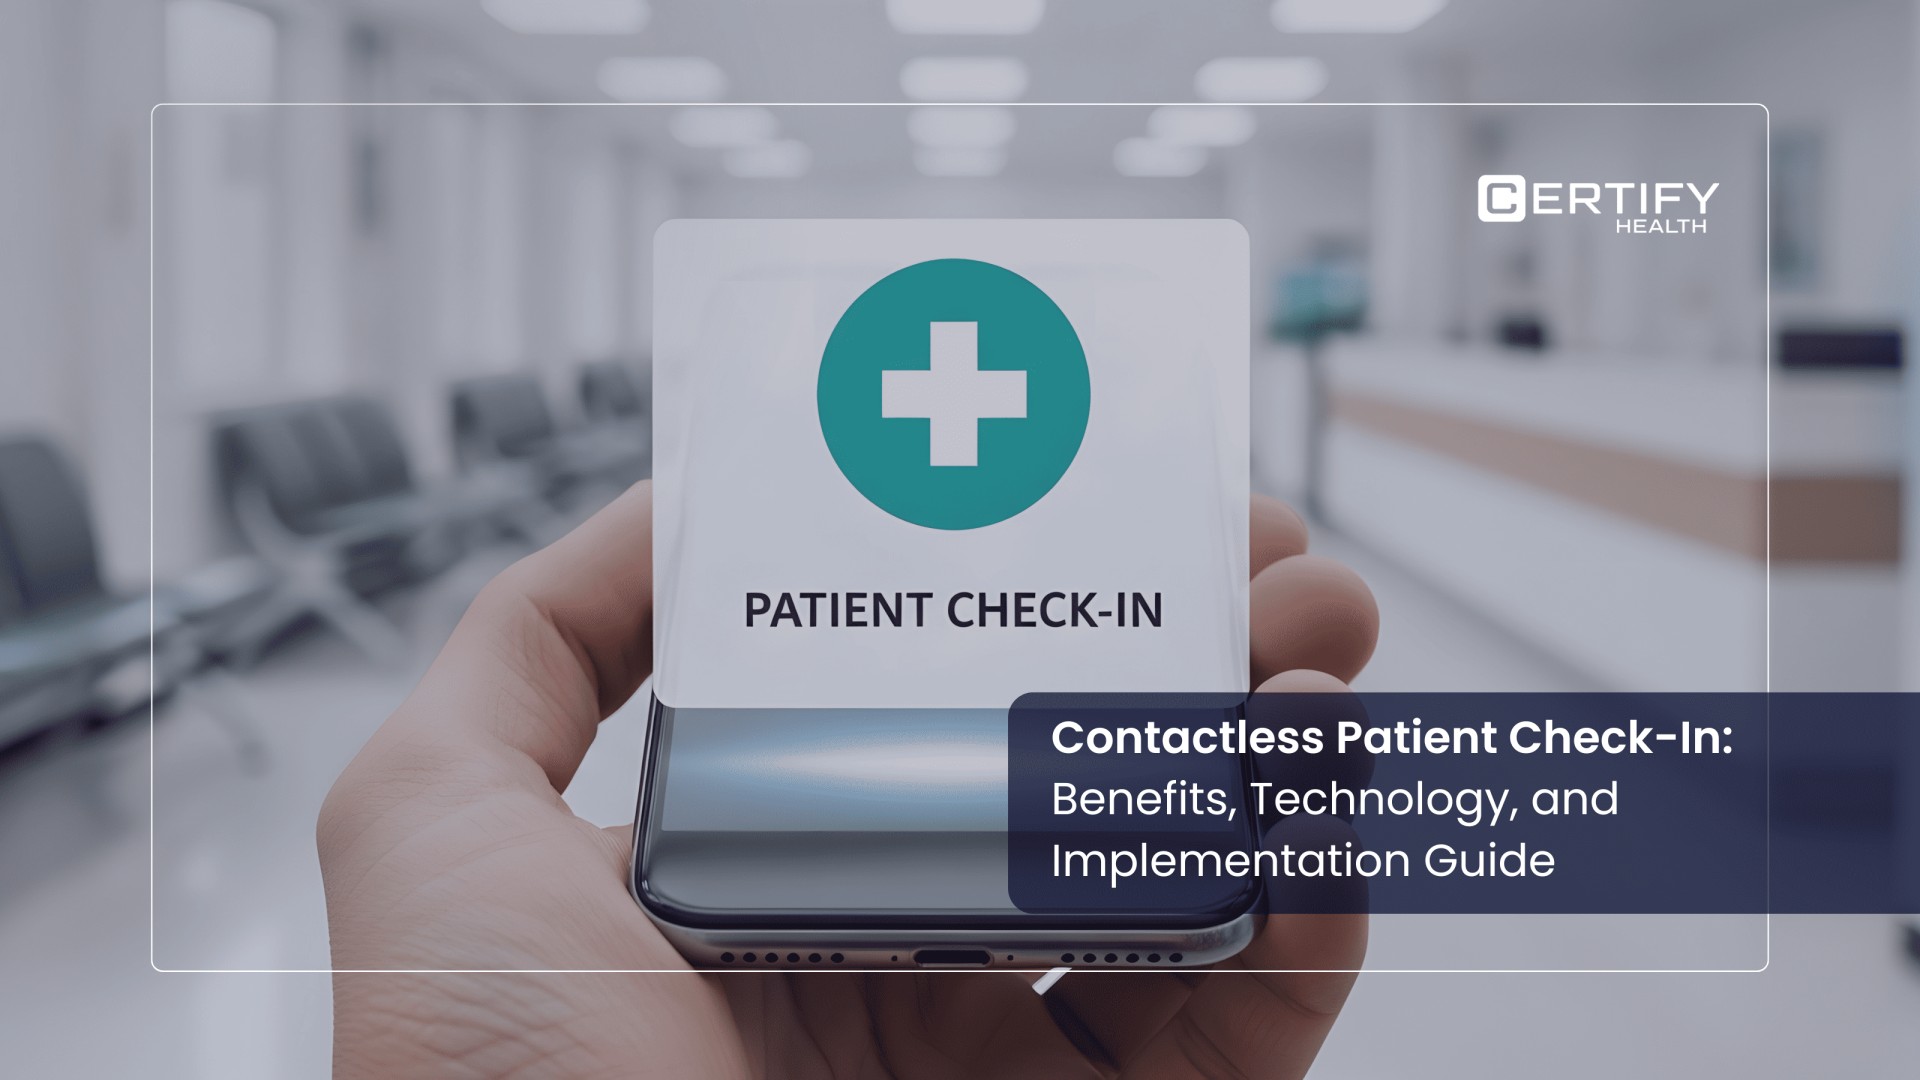
Patients Are Done with Clipboards
Remember the last time you skipped the airport line by checking in on your phone?
You pulled out your phone, tapped a few times, and walked straight through. Patients now expect the same convenience at the doctor’s office.
One widely referenced example comes from Children’s Hospital of Orange County, where digital intake workflows reportedly shortened patient check-in times from roughly 4.5 minutes to nearly 20 seconds — showing how dramatically modernized access workflows can improve efficiency at scale.
That shift accelerated after COVID-19. Patients became used to handling everyday tasks online, yet many clinics still rely on paper forms, manual data entry, and crowded front desks. The result is longer wait times, billing mistakes, and frustrated staff.
Contactless patient check-in changes that. Patients can complete forms, verify insurance, sign consents, and pay balances from their phone, a kiosk, or a patient portal — before they even reach the front desk.
This guide explains how contactless patient check-in works, why it improves both patient experience and revenue cycle performance, and how to implement it successfully in your practice.
1. What Is Contactless Patient Check-In Today?
1.1 It Is More Than a Kiosk
Most people think of a screen near the front desk when they hear “contactless check-in.” That is only part of the picture.
Today, a patient can check in two days before their visit — from their couch, on their phone. By the time they walk in, they are already verified, their insurance is confirmed, and they have signed their forms. The kiosk, if they use it at all, takes just 30 seconds to confirm they have arrived.
The tools involved include smartphones, text and email links, patient portals, QR codes, in-lobby kiosks, and tablets. Some patients use all of them. Others use just one. A well-built system handles all of them.
1.2 What a Full Contactless Check-In Covers
Here is what a complete contactless patient check-in experience includes:
- Online forms before the visit. Patients fill out their health history and sign consent forms from home. No clipboards. No staff re-typing anything.
- Insurance verification. Patients scan or upload their insurance card. The system checks their coverage in real time — before they even arrive.
- Upfront payment collection. Co-pays and cost estimates are collected at check-in, not after the visit. This is one of the best ways to collect payments at the right time.
- Virtual waiting room. Patients receive a text when it is their turn. The lobby stays less crowded. Waits feel shorter.
- Language and consent preferences. Patients set these once. The system remembers them for every subsequent visit.
1.3 Where Check-In Fits the Big Picture
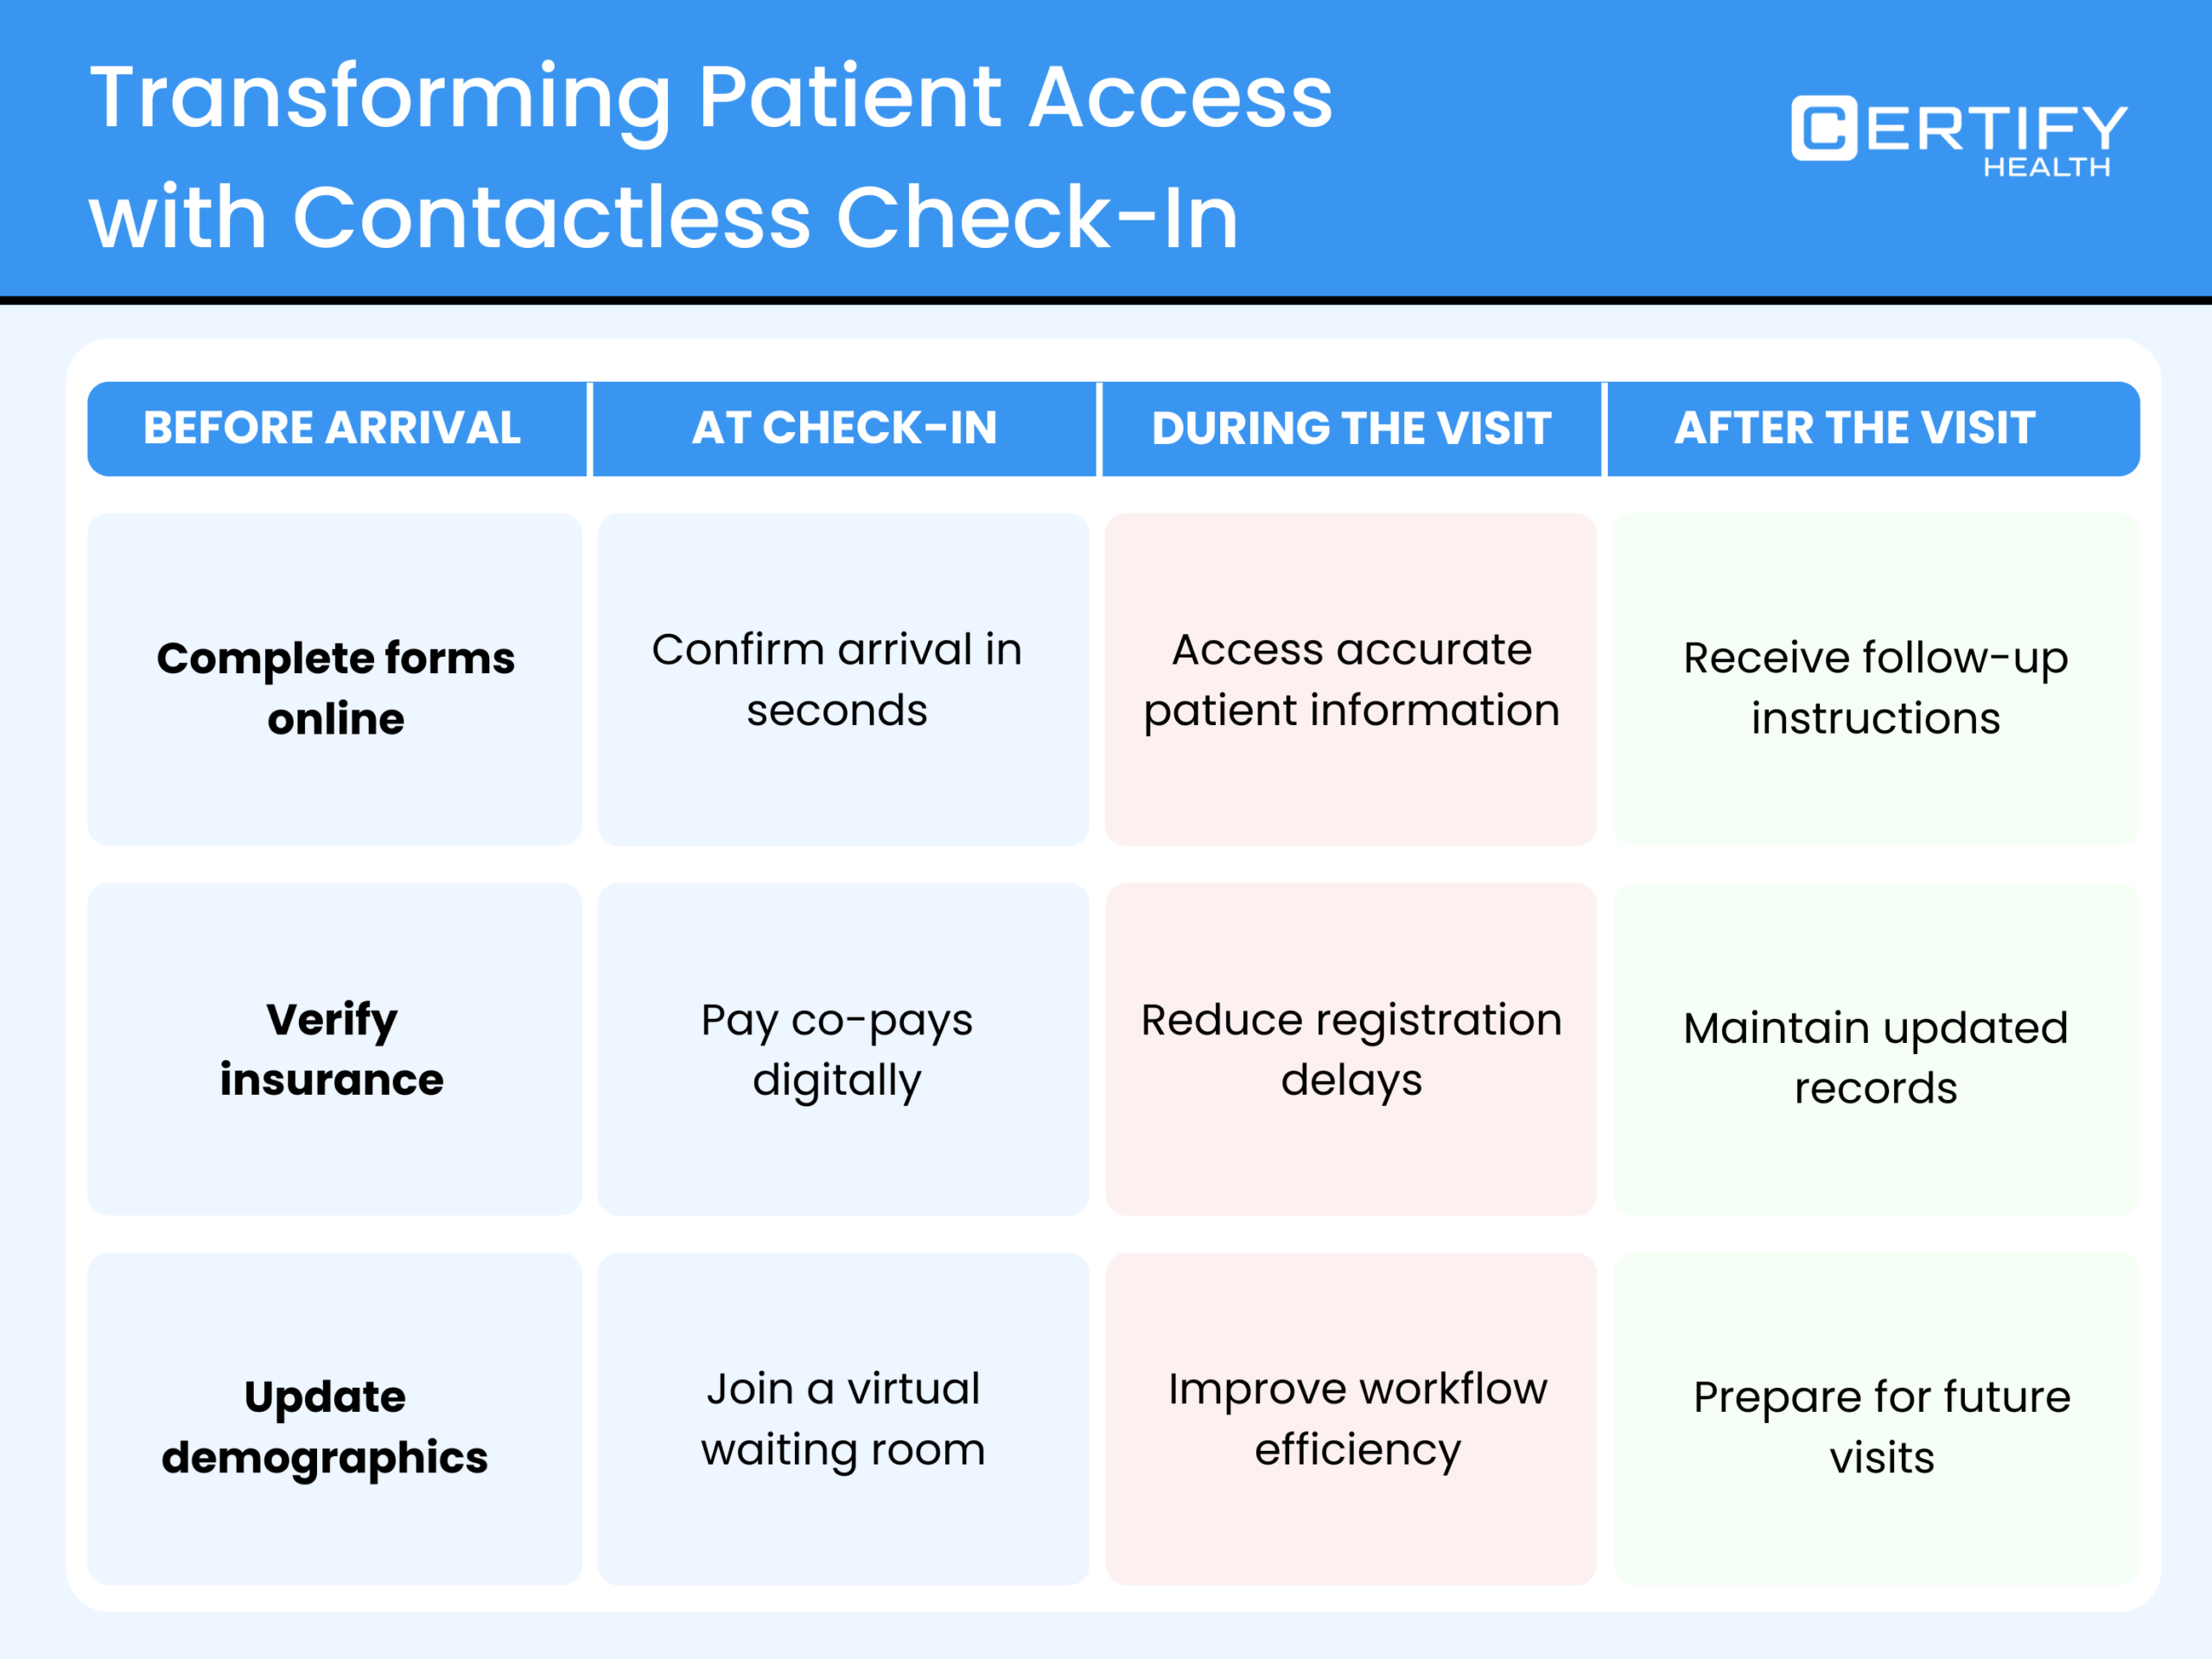
Digital patient check-in does not stand alone. It is one step in a longer journey — from booking an appointment to receiving a reminder, checking in, completing the visit, and following up on care.
When all these steps share the same data, patients do not have to repeat themselves. Staff do not have to re-enter the same details. Everything flows. Want to see how contactless check-in fits into the bigger picture of modern patient expectations and healthcare access today? It is an important example to examine before choosing any new patient access technology.
2. Why Contactless Check-In Matters
2.1 What Patients Get
No one likes sitting in a waiting room longer than necessary.
Research highlighted by MGMA found that convenience now plays a major role in patient loyalty. A Harris Poll commissioned by Tegria found that 69% of patients said they would switch healthcare providers for a more convenient experience, while long wait times continue to frustrate patients and hurt retention.
A smooth start helps patients keep appointments, follow care plans, and pay on time. Contactless check-in puts patients in control by letting them complete their information on their own device, at a time that works best for them.
Good patient check-in software also works in multiple languages and supports screen readers and large text. That means more patients can use it — not just those who are tech-savvy.
2.2 What Staff Get
Think about how much time a front-desk team member spends on administrative tasks each day. Collecting forms. Re-typing data. Answering calls about directions or account balances. Correcting data entry mistakes.
Contactless check-in takes most of that off their plate. Data flows directly from the patient’s phone or kiosk into your system — no middle step. That means fewer errors and less cleanup time.
Healthcare workflow automation is not about replacing people. It is about giving them time back for the work that actually requires a human.
2.3 What It Does for Your Billing
This is where the financial impact becomes impossible to ignore.
A significant share of claim denials stems from bad registration data — wrong insurance numbers, misspelled names, out-of-date addresses. When patients enter their own data and the system validates it against the payer in real time, the information is clean from the start. Clean data means fewer denied claims, less rework, and faster reimbursement.
How self-check-in kiosks are reshaping healthcare economics goes deeper on this connection between digital intake and billing outcomes.
Digital patient intake also shows patients what they owe before the visit begins. When patients can pay by phone or at the kiosk before seeing the provider, more money is collected on the spot — and less ends up as bad debt.
Fewer denials + more upfront payments + less rework = a healthier bottom line. For a closer look at the numbers, see how modern check-in and intake platforms increase practice profits.
2.4 Safety and Trust
Reducing shared surfaces and crowded waiting rooms still matters — particularly for older patients and high-volume clinics.
Digital workflows also create a clear audit trail. Every form signed, every insurance check run, and every data point entered is saved and logged. That is far easier to audit and harder to dispute than a stack of paper forms.
There is also a less tangible benefit: patients trust a practice that looks organized and modern. That impression starts at check-in.
3. The Technology Behind Contactless Check-In
3.1 What the System Is Made Of
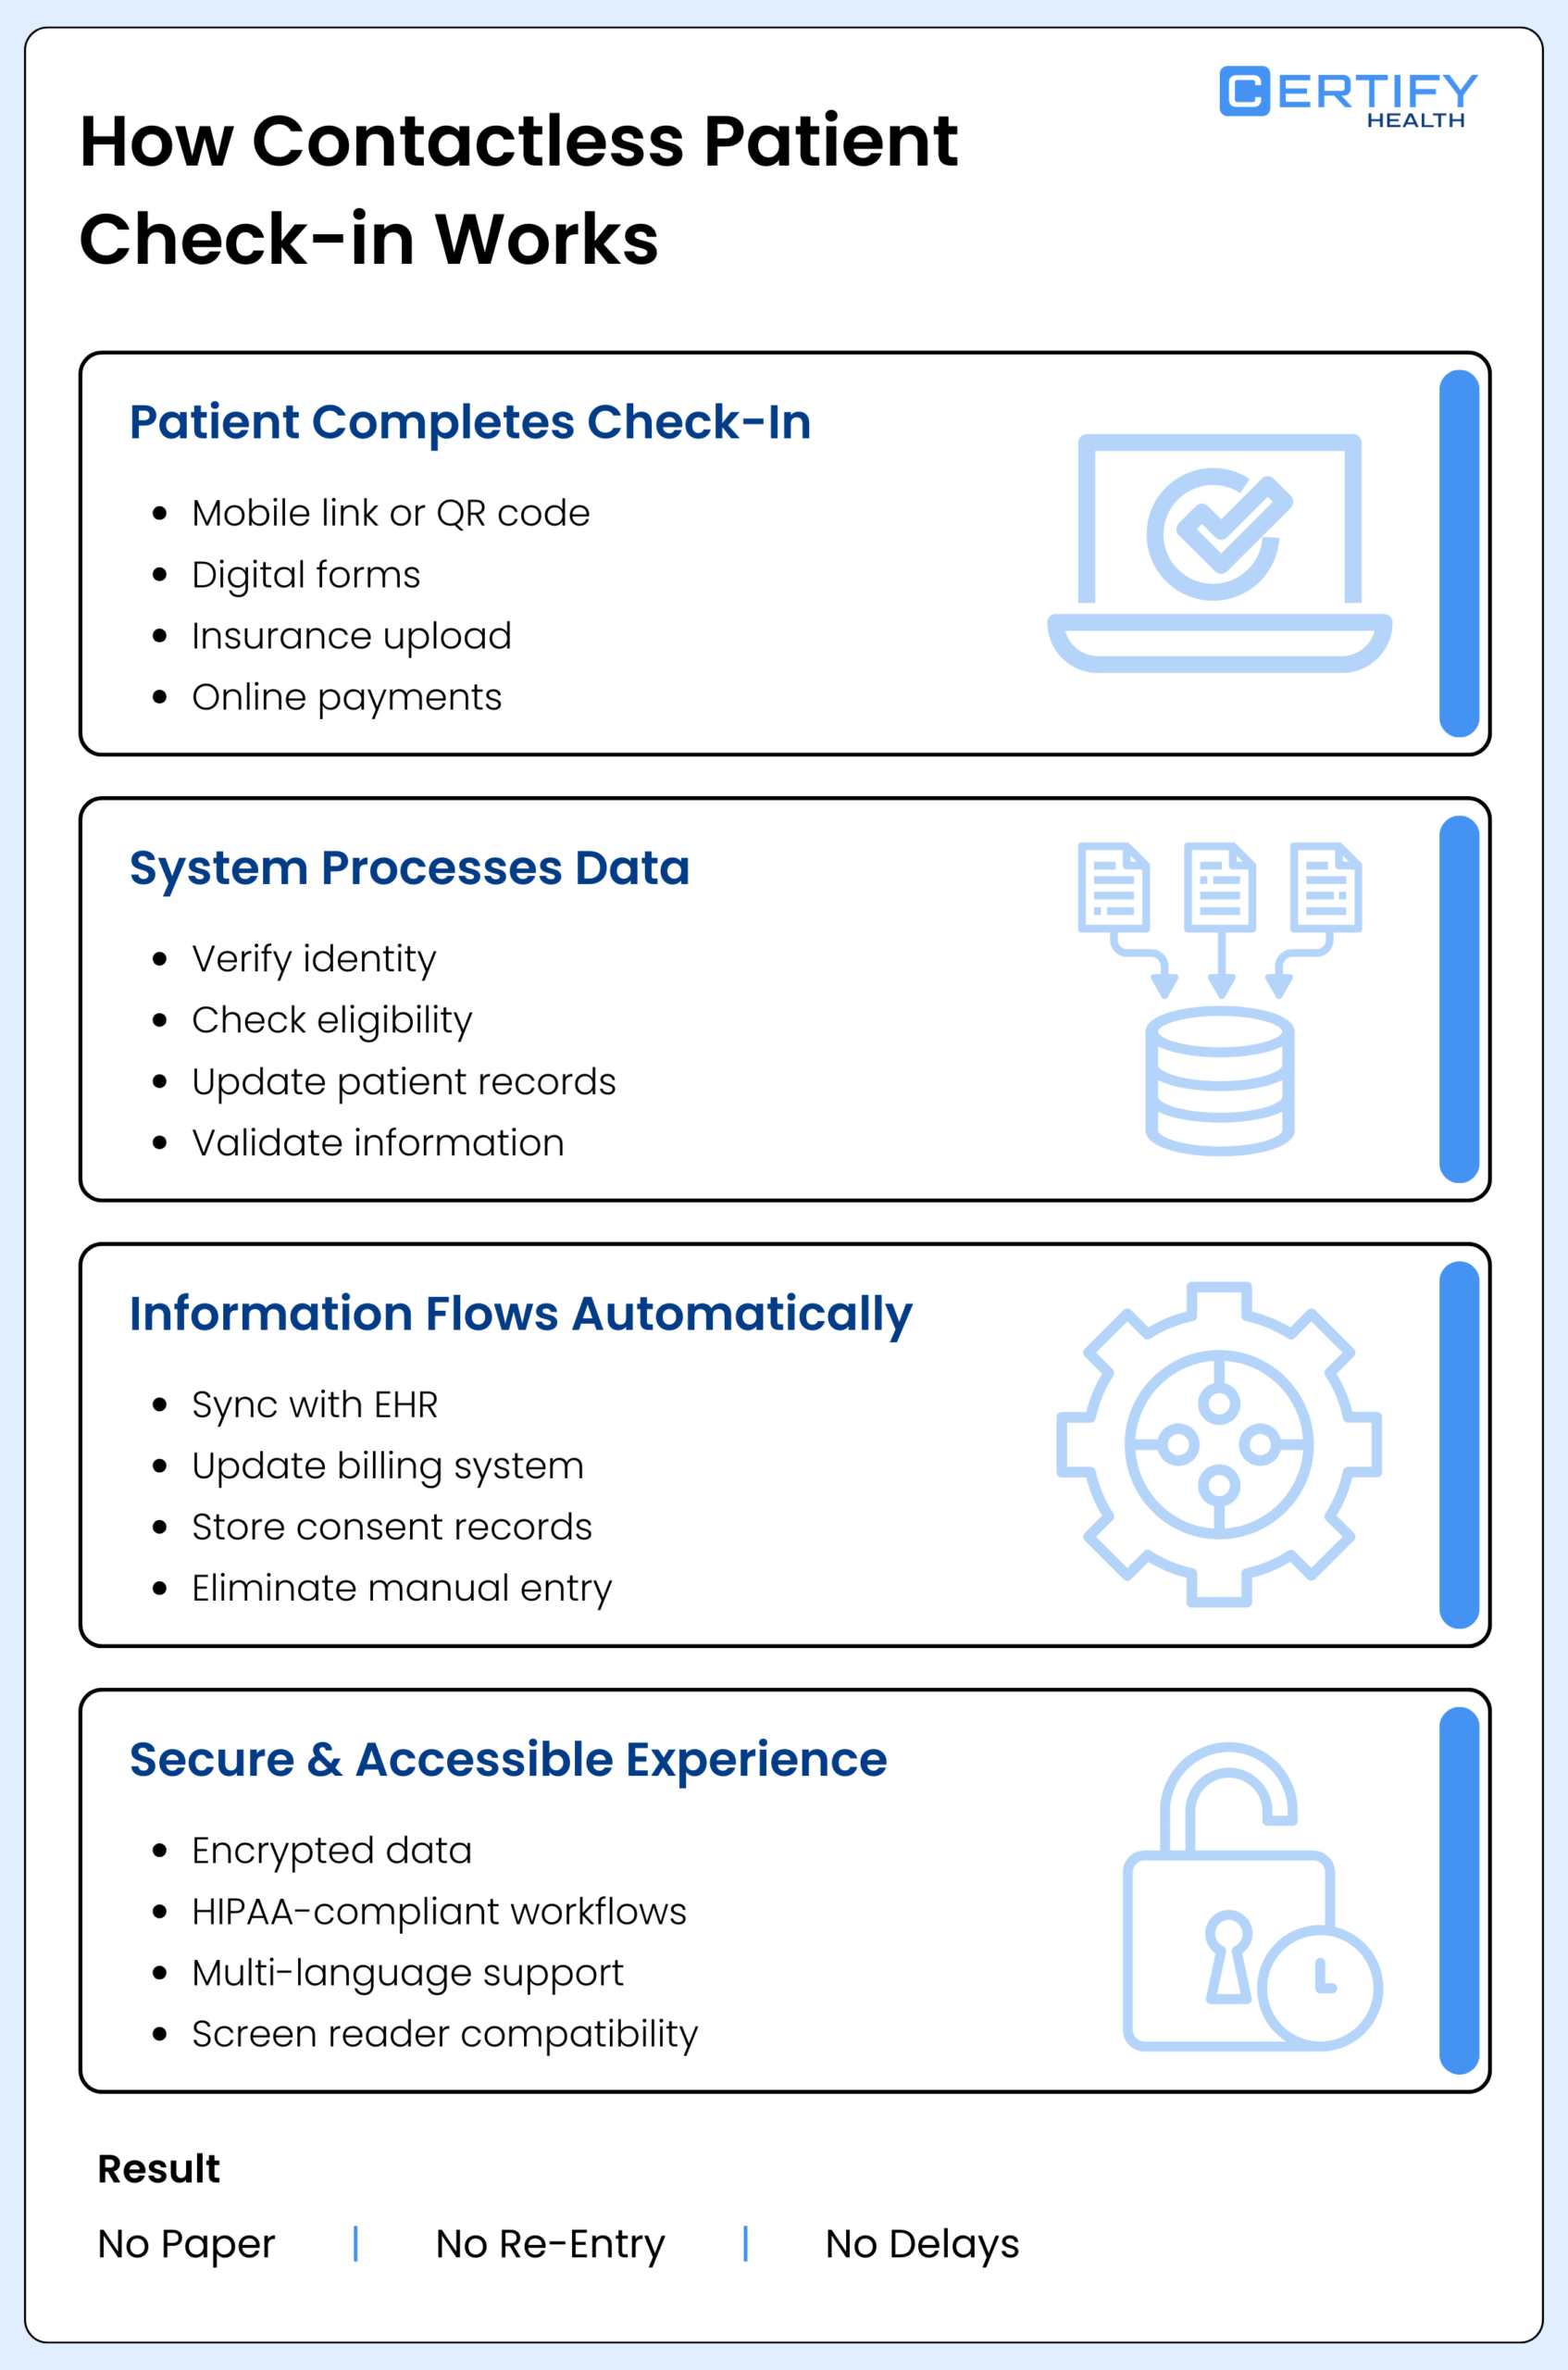
A contactless check-in system has two main layers.
The patient-facing layer is what patients see and interact with. It includes mobile check-in, text links, QR codes, self-service kiosks, and portal options. A well-designed patient check-in kiosk handles ID capture, insurance upload, intake forms, and payment — all without staff involvement.
The back-end layer is where the real work happens. It connects to your electronic health record (EHR) and billing system, runs real-time insurance eligibility checks, verifies patient identity, and processes payments. Without this layer functioning well, the front end is just a prettier form that still creates manual work downstream.
3.2 How Information Moves Through the System
Here is a simple example of how it works in practice:
A patient receives a text link the day before their appointment. They open it, confirm their details, photograph their insurance card, and sign their consent forms. The system checks their insurance in real time. When they arrive, they scan a QR code at the kiosk or head straight to the waiting area — because they are already done. Their data is already in the EHR. Billing starts automatically. No paper. No re-entry. No delays.
For this to work across multiple locations or with different EHR systems, the platform must connect to all of them cleanly and handle cases where the same patient exists in more than one system.
3.3 Security and Privacy
Patient data is sensitive. A contactless check-in system must protect it at every step — through encrypted data transmission, secure payment handling, and clear access controls.
From a compliance standpoint, the system must adhere to HIPAA for health data and PCI-DSS for payment processing. It must log every action and store consent records properly. These are not optional extras — they are the baseline requirement.
3.4 Built for All Patients
Technology that only works for younger or more tech-confident patients is not solving the problem.
Good patient check-in software uses plain language, presents one step at a time, handles errors clearly, works with screen readers, and is available in multiple languages. It is built for older patients, patients with disabilities, and patients who are not comfortable with technology.
4. Mobile, Kiosk, or Both — Which Is Right for You?
4.1 Mobile Check-In
Best for: Clinics with scheduled visits, repeat patients, younger or tech-comfortable populations.
Mobile patient check-in lets patients handle everything on their phone before they arrive. No hardware to purchase or maintain. Easy to deploy across additional locations. Patients can complete the process the night before and simply walk in.
The main challenge is that not every patient has a smartphone or is comfortable using one. Clear text instructions and a fallback option for those patients are essential.
4.2 Kiosk Check-In
Best for: Walk-in clinics, urgent care centers, imaging centers, and high-traffic lobbies.
A medical check-in kiosk is easy to find and built to handle fast, busy workflows. It is especially useful when patients arrive without pre-registering. For a detailed look at the ROI comparison between kiosk and manual check-in, see Kiosk vs. Manual Check-In: Clinic ROI. A well-placed patient self check-in kiosk can reduce front-desk congestion by 60 to 80 percent.
You will need to plan for kiosk placement, cleaning protocols, and network connectivity.
4.3 Both Together
Most practices benefit from both options. Mobile for patients who check in before they arrive. Kiosk for walk-ins. Staff-assisted digital tools for patients who need extra help.
The key is that both channels follow the same rules — the same insurance checks, the same consent steps, the same forms. When channels operate differently, errors follow.
4.4 A Simple Way to Choose
| Setting | Volume | Patient Mix | Best Fit |
|---|---|---|---|
| Specialty clinic, scheduled visits | Low–Medium | Mixed ages | Mobile-first, kiosk as backup |
| Urgent care / imaging center | High | Walk-ins | Kiosk-first, mobile for pre-registration |
| Multi-site health system | High | Diverse | Both, on one central platform |
| Community health center | Medium | Low tech comfort | Staff-assisted digital + kiosk |
5. How to Roll Out Contactless Check-In
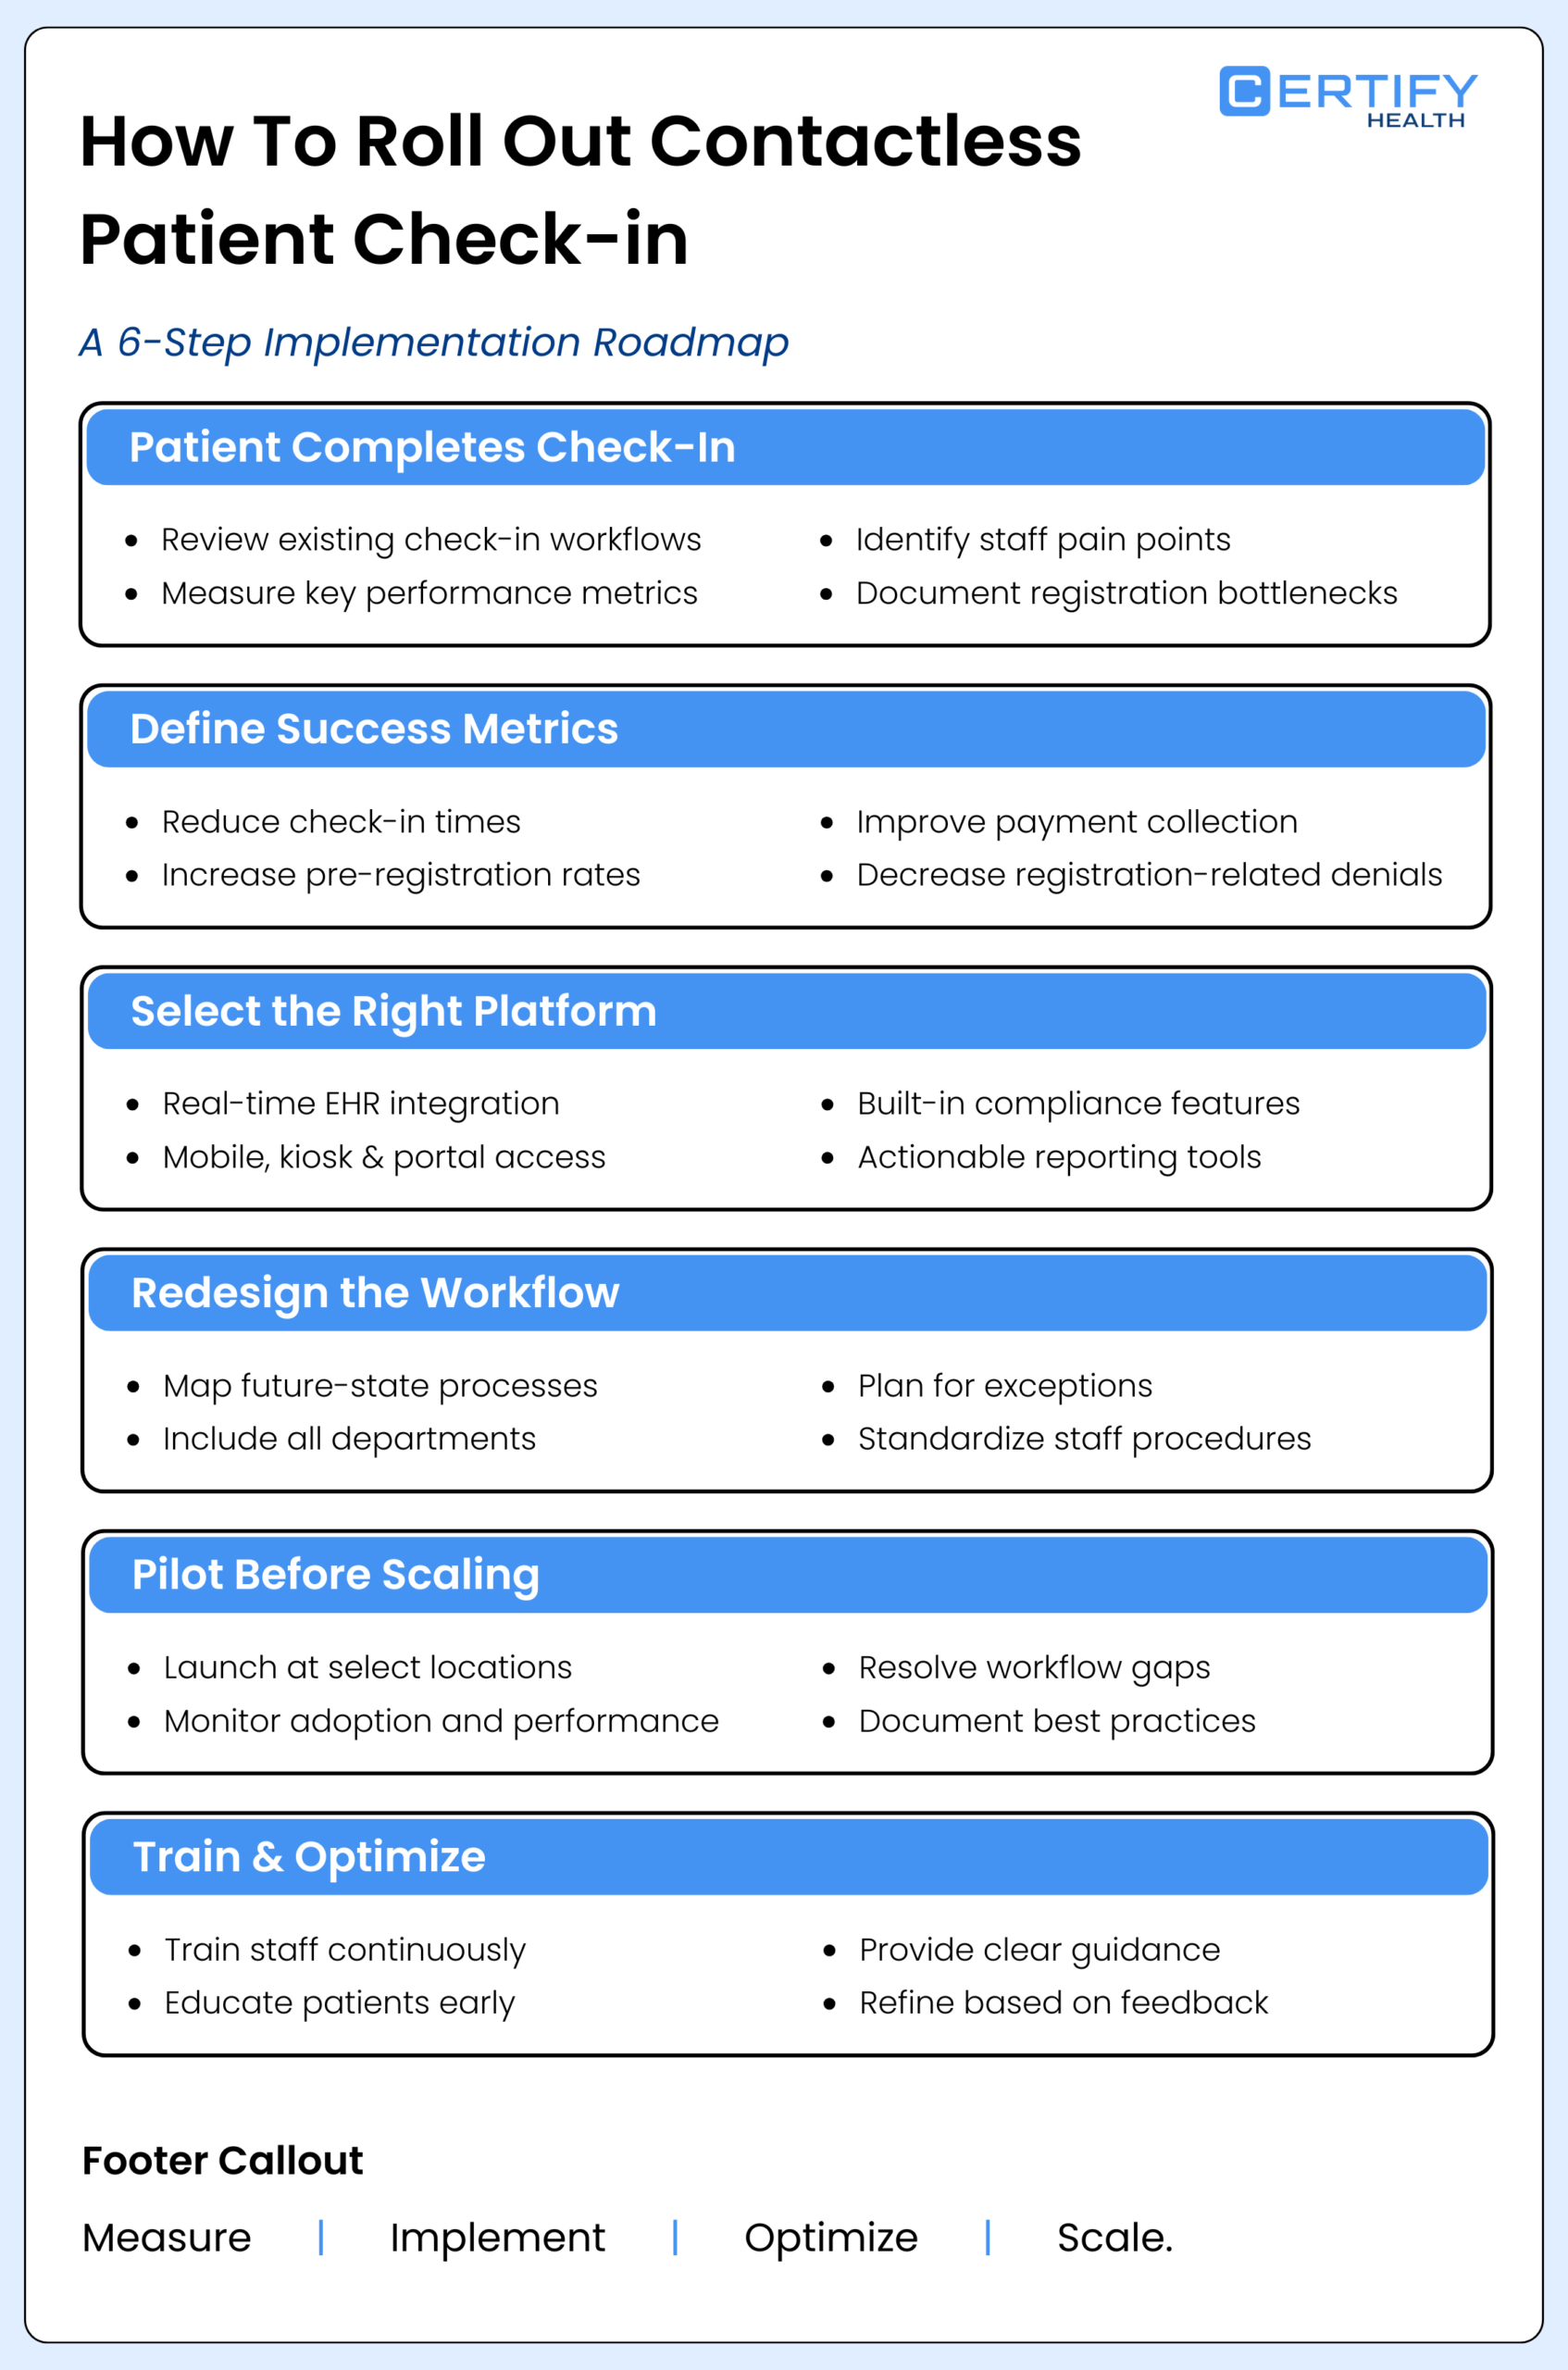
Step 1 – Start With What You Have
Review your current check-in process before changing anything. Are you using paper, tablets, a portal, or a mix? Track the basics: how long check-in takes, what percentage of patients pre-register, your no-show rate, and how many claim denials trace back to registration errors.
Talk to your front-desk staff. The friction points they experience every day are the ones you need to address first.
Step 2 – Set Goals You Can Measure
Define clear targets before you begin. For example: reduce check-in time by 40 percent, increase same-day payment collection by 20 percent, and cut registration-related denials by 30 percent.
Set goals that matter to your operations team, billing team, and patient experience team. Each group cares about different outcomes.
Step 3 – Choose the Right Software
Not all patient intake software works the same way. When evaluating options, look for:
- Live EHR integration: Data should sync bidirectionally in real time — not through file uploads or manual exports.
- Multi-channel support: Mobile, kiosk, web portal, and walk-in workflows should all run from one platform.
- Built-in compliance: HIPAA and payment security should be foundational, not bolted on.
- Real implementation support: A partner who configures workflows with you, not just a user manual.
- Out-of-the-box reporting: Denial rates, check-in completion, and collection data should be available without custom builds.
Step 4 – Redesign the Workflow
Sit down with your front-desk team, clinicians, and billing staff to map out the new process together. Do not simply digitize the old workflow — rethink it.
Plan for edge cases: walk-ins, patients without smartphones, minors, parents checking in on behalf of a child, and what happens if the system goes down. Write scripts so staff know exactly what to say and do.
The practices that get the most out of self-service patient check-in treat this step as a genuine redesign — not just a software swap.
Step 5 – Pilot First
Start at one or two locations. Give it 60 to 90 days. Ask: Where do patients drop off mid-check-in? What slows staff down? What is the actual pre-registration completion rate?
Fix the friction points. Document what works. Then roll out to additional sites with those improvements already in place.
Step 6 – Train Continuously
Staff training is not a one-time event. Show each role what has changed — what they no longer have to do, how to handle exceptions, and how to assist patients who need support.
For patients, use appointment reminder texts to introduce online check-in. Add a FAQ to your website. Post a sign near the kiosk. Most patients figure it out quickly when the steps are clear and short.
6. How to Know It Is Working
6.1 Day-to-Day Metrics
- How does check-in time compare to before implementation?
- What share of patients complete pre-registration before they arrive?
- How has lobby congestion changed? How long do patients wait?
- What do patient satisfaction scores show for the check-in experience?
6.2 Billing Metrics
- How often are claims denied due to registration errors?
- Is your clean claim rate trending upward?
- How much is being collected at the point of service?
- How many staff hours per week have been reclaimed from intake tasks?
6.3 What Good Reporting Looks Like
Your operations team needs daily or weekly data: how many patients completed check-in, how many encountered errors, and how much was collected. Your billing team needs denial trends and collection rate data. Your patient experience team needs satisfaction scores broken down by channel.
This reporting should be ready out of the box. If your team is building these dashboards from scratch, your platform is not carrying its weight.
7. What This Looks Like in the Real World
Scenario 1: Busy Urgent Care Clinic
A walk-in urgent care center sees 100 patients a day. The lobby is packed. Intake is done on paper. Staff are overwhelmed before care even begins.
Adding kiosk-first digital check-in changes the picture quickly. Patients walk up, confirm their identity, complete intake, and receive a queue number. Staff see a live list of who is waiting and what care they need. The lobby clears. Staff redirect their energy to care delivery.
Scenario 2: Multi-Site Imaging Group
A 12-location imaging group handles both scheduled and walk-in visits. Without a standardized digital patient check-in process, each location has developed its own workarounds. Data varies from site to site. Billing problems compound.
One central intake platform resolves this. The same forms, the same insurance checks, the same consent steps — at every location. Less rework. Fewer denied claims. Consistent process everywhere.
Scenario 3: Health System With Multiple EHR Systems
A large health system runs two different EHR platforms across its clinics and hospital locations. Front-desk processes are inconsistent and difficult to manage centrally.
A platform that integrates with both EHRs and centralizes check-in rules and reporting gives the system a single, clear view of patient access — while still accommodating how each location operates.
8. Where This Is All Going
The next few years will bring new capabilities to the check-in process: forms that pre-populate based on a patient’s visit history, real-time wait time estimates sent directly to a patient’s phone, and care journeys that blend in-person and virtual visits without requiring the patient to start from scratch each time.
The practices that will be ready for these capabilities are the ones building on a solid foundation right now. Replacing a limited system in three years is costly and slow. Starting with the right platform means you only do it once.
9. CERTIFY Health: Built for the Whole Patient Journey

If you are evaluating an upgrade to your contactless patient check-in process, CERTIFY Health is worth a close look — not as a single point solution, but as a full patient experience and billing platform.
CERTIFY Health’s mobile check-in lets patients enroll using biometric face verification, complete digital intake forms, upload their insurance card, and pay their co-pay via Apple Pay, Google Pay, or ACH — all before they walk through the door. The self-service kiosk handles high-volume in-person workflows with live insurance checks, digital intake, and automatic data validation. It is ADA-compliant and supports screen reader tools, so visually impaired patients can complete check-in independently.
Both channels connect directly to your EHR and billing system — including Epic, eClinicalWorks, AdvancedMD, NextGen, and Meditech — with live, bidirectional data sync. No file uploads. No re-entry. What a patient enters flows straight into your clinical and billing workflows.
CERTIFY Health also covers every other step in the digital front door: online scheduling, appointment reminders, digital patient registration, insurance eligibility checks, payment collection, post-visit surveys, and two-way secure messaging — all from one system. For practices managing multiple locations or a mix of EHR platforms, that integration makes a meaningful operational difference.
10. What to Do Next
Take an honest look at how check-in works today. How long does it take? How many denied claims trace back to registration errors? How many staff hours each week are consumed by intake tasks?
If those numbers are not where you want them, that is your starting point. Contactless patient check-in is one of the highest-return investments a healthcare practice can make — but only when it is implemented as a connected workflow, not a one-off tool.
Know where you stand. Set a measurable goal. Choose a partner with real EHR integrations, multi-channel support, and reporting that works out of the box.
To see how CERTIFY Health fits your setting, book a demo and bring your current numbers. The conversation is far more productive when it starts with real data.